© Copyright 2022 - QSV D. Sakarelis S.A. Developed by Creative Look
QSV
Surfaces Preparation Guidelines
Surfaces Preparation Guidelines
Colours – Varnishes
Surfaces accumulate dirt and a variety of stains and contamination that change their appearance. A direct coat of paint will not correct any surface imperfection, so you have to follow a certain preparation before applying the paint. If not, these imperfections will downgrade the quality, appearance and properties of final paint. Proper surface preparation often takes much longer than the actual application of paint. All surfaces must be clean, dry and free from dirt, dust, oil, grease, chalk and any other contamination that would affect the adhesion of new coating.Bare surfaces must be properly prepared (choose the right primer for each type of surface) prior to application of the topcoat.
01. GENERAL INSTRUCTIONS FOR UNPAINTED SURFACES
02. GENERAL INSTRUCTIONS FOR PREVIOUSLY PAINTED SURFACES
03. WALLS
04. WOODEN SURFACES
05. METAL SURFACES
06. OTHER SURFACES
01. GENERAL INSTRUCTIONS FOR UNPAINTED SURFACES
Clean the Surface well
Do not apply the primer until you remove any sight of dirt, rust, mould etc Clean the area well to remove any impurity and allow surface to dry in complete, before priming. Do not use harsh detergents for cleaning surfaces (f.e. a certain wall area), because you might penetrate the surface and downgrade the properties of final paint. If you decide to use bleach for cleaning, make sure to let surface dry completely before primer/paint application.
Select the Primer
The right choice on the primer is critical for a high quality result. A primer is essential if the surface is very porous or has uneven porosity on the overall area. Keep in mind as a general rule: Any unpainted surface should be primed. Primers have been developed and specialised on certain surfaces: wood, stone, plaster, metal, so it is very important to choose the right one, depending on the kind of surface.
Read technical data sheets or any other technical information provided by manufacturer and focus on spreading rate (area painted / litre of paint), drying time, recoatability and any further given advice about the product.
02. GENERAL INSTRUCTIONS FOR PREVIOUSLY PAINTED SURFACES
General information
Examine the area and search the surface for possible cracks, loosen paint, blisters and any other failure of previous applied paint. Observe those areas well and then decide how to treat the surface depending on the kind and size of damage done. The most common methods used to treat the surface are:
Scraping
This is the most common and effective methods for removing loosen paint or paint failures from walls and all flat surfaces of wood, stone, metal, etc. For perfect results retain the scrapping tool in good condition and apply equal pressure as you scrape the surface. Scrape towards a certain direction and then scrape again on a vertical direction to your previous work (90 degrees). Use suitable tools for corners and round areas. On wooden surfaces be very careful not to apply high pressure and damage the wood. For hard surfaces you can use a two-hand scraper. Rub the area, remove all loosen paint and use a medium sand paper to sand the surface. Wear goggles or protection mask for the eyes, work uniform for skin protection and avoid breathing dust by using a simple respiratory mask.
Wire brushing
A stiff wire brushing is able to rub and remove loosen paint from surface, but you should be very careful not to damage the area. After you finish brushing, use a sandpaper to make surface smooth and level. Take all precautionary measures, wear goggles, protection gloves, work uniform and a respiratory mask.
Sanding
After scraping or brushing the area use progressively fine sandpapers to sand the surface. Depending on surface start sanding with coarse, medium or fine grade sandpaper.
03. WALLS
Inspect the area carefully for stains, dirt, dust, inc spots, etc. In this case it is able to use a suitable detergent agent. In any case and just before paint application, surface should be clean and free from traces of dust, dirt and detergent. It is very important to allow the surface to dry completely. If there are any imperfections or small cracks on the area use putty to cover. For new unpainted surfaces follow the general instructions for unpainted surfaces.
If the area was previously painted, search, find and remove all loosen paint, scrape and sand the surface well following some of the methods given on general instructions for unpainted surfaces Use putty to fill holes and repair any cracks before priming. Apply one hand of primer (waterbased or solventbased) and allow surface to dry in depth. If you are not sure about drying time seek advice on any technical data provided by manufacturer (on label or on technical data sheets). Then apply the final paint following the manufacturer’s application instructions.
04. WOODEN SURFACES
If wooden surface is not flat, try to carefully sand it using medium grade sandpaper. Make sure you sand with the grain. Use a cloth to remove the formatted dust. You can use a wet cloth and wait to see if water causes the grains of wood to raise. In this case try to sand the surface using fine sandpaper. This will avoid phenomena of raising grains on surface when you apply the primer or final paint. Use a heavy coat of specialized primer for wood and let surface dry in depth. If needed apply a second coat of primer and apply final paint after (sanding of surface may also be needed before applying final paint). If solvent based products are used, you are advised to wear a simple protective respiratory mask and be sure to work on well ventilated places.
05. METAL SURFACES
Most paints do not have good adhesion on glossy surfaces (new or previously painted), so you are advised to prepare the surface well before paint application. Use a new fine sandpaper to sand the surface and a wet cloth to remove any dust. If chemicals or removers are used to treat the surface handle them with extremely attention and work always in well ventilated areas.
Of course this can be avoided if you choose to use a special primer for glossy surfaces instead. Follow all application instructions given (on label or TDS) and take all precautionary safety measures needed (use goggles, wear gloves, use a respiratory mask).
Solvent Cleaning
Includes: Wipe surface using a solvent and a cloth, immersion of metal in solvent, spray solvent on surface, etc. Solvent cleaning is used primarily to remove oil, grease, dirt, soil, drawing compounds and other similar organic compounds.
Tools
First remove oil, grease by cleaning. Scrape the area to remove all loosen paint, rust and any impurity. Type of tools to be used: sandpapers, brushes, scrapers, etc.
06. OTHER SURFACES
Fungi and mould removal
Mould appears as black, brown, grey spots on walls and other surfaces and is very difficult to eliminate. It is essential to remove mould/fungus before any paint application, because there is a serious chance for mould to spread and grow through paint film and appear again on surface.
In this case, use a 3:1 mixture of water household detergent or antifungal agents. Spread the mixture on surface and let it act for about 20 minutes. Then rinse the area with water and if needed apply again using a mild detergent. Allow the surface to dry in depth and apply the paint (you could use an antibacterial paint)
Always wear eye protection, gloves and old clothes when using bleach or fungicides.
Nicotine, grease, smoke stains, fire damage
Use a detergent and clean the area as well as possible. Allow the surface to dry and use a primer to cover the stains. In case stains are not possible to be removed or are still visible through primers’ first coat, apply a second hand. Let surface dry in depth and then apply the finish coat. In case of fire damage use a solvent based primer with high hiding power properties to cover stains and reduce odour.
More Products from Colours – Varnishes
Internal Surfaces
Explore more
External surfaces
Explore more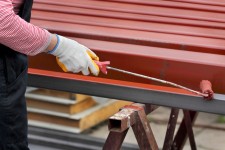
Μetallic Surfaces
Explore more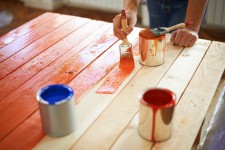
Enamel paints for wood
Explore more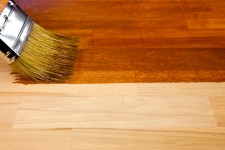
Wood and Stone Protection
Explore more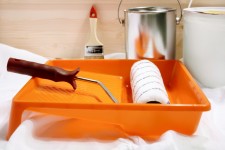
Special Use – Supplies
Explore more
Colorfull System
Explore more

